Friday, March 29, 2013

Continuing Inward

When last I wrote, we had just finished putting up stakes and strings for the inside walls for the bedroom, bath and pantry.  I've spent the last three weeks trenching and building forms.

First trenching done.  

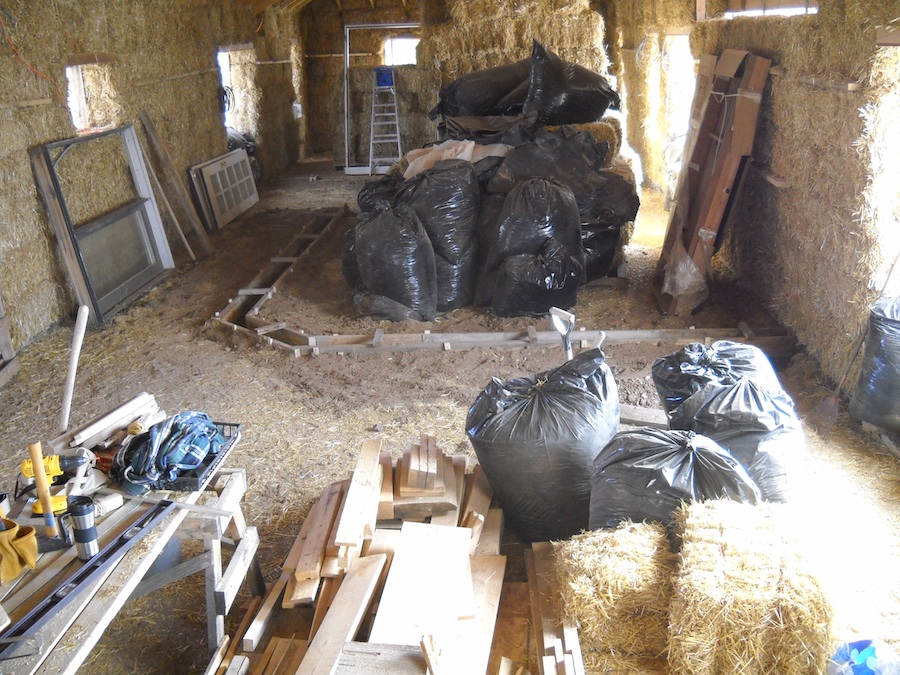
Forms in place. They only go so far because trenching for the plumbing needs to be done before the rest of the forms can be put in place.
This pictures shows the footing where the three foot high adobe wall separating the sun space from the bedroom will go.  There will be a wooden post at the end of the adobe wall that will go up to the ceiling.  The post will be some more wood from the old bridge. There will be an opening into the bedroom but no door.

Here you can see the trenching I've done for the plumbing.  The shallower trench on the left is for the cold water from the pressure tank that will be in the garage.  Hot water will also go in this trench from the on-demand hot water heater in the bathroom back to the washer in the garage and forward toward the kitchen. I know this trench looks shallow but there will be maybe 6 more inches of dirt for the floor once the trench is filled in.

The deep trench toward the back of the picture is for the gray water.
The closer deep trench is for the black water.

Trenching done I can now finish the forms.
Forms are completed and rebar is in place.

The biggest challenge here has been dirt management.  The soil is very dry and loose and I had to be careful where I put it. More than once I realized that I had piled dirt over a spot where I was going to have to trench. Often I would add to the pile only to have it roll down the mound back into the trench! Thought about running a hose into the house to wet down the dirt but with all that exposed straw, I felt that would be tempting fate. We will just have to live with the loose soil until we can refill all the trenching - after the plumbing is installed - and the concrete footings are poured.

We are currently waiting for an estimate on the plumbing.  We have to have a certified plumber install the propane line but we have always thought we'd do the rest of the plumbing ourselves.  We decided to see just how much it would cost to have the guy doing the gas line do the plumbing, too. We'll see. We may end up doing the plumbing anyway. We cannot pour the footings until the plumbing is roughed in and we cannot build the walls until the footings are poured so we are in a bit of a holding pattern.

While we're waiting for the plumbing to be resolved we have moved back into the garage to finish the east end.  We will be installing two non-opening windows plus a small access door. Quite a while back, we picked up some double pane windows at the Habitat Re-Store and this past week Rick built frames for them.
They have been stained red and look really nice.

This is where one of the windows will go.
This picture shows the two windows with the access door in the middle. Straw bales will be stacked on this wall once the windows are installed. The outside will then be covered with underlayment like we did on the roof and corrugated siding. Should look pretty cool.


Sunday, March 10, 2013

Onward & Inward

Days are starting to warm up but work continues inside.  We have done just about all the bale stacking we can for the time being.  The last we did was above the adobe wall.

We still have to stack bales at the end of the garage but Rick must make some windows and a door for the wall above the garage doors that will allow us to store wood in the "attic" before we can get to that so it's on to digging the footings and making forms for the inside walls.


I decided to start with the wall between the office and studio as it was the least complex. Here you see that the ditch has been dug and the first form board installed.  The footings will be 8" deep and 8" wide so I had to first set a string at the height of the grade beam. Then I dug down to give the depth that I needed.  Then, using the string as a guide, I started setting the forms.  The notch on the left is the step-down for the door into the office.

Here the form is finished and the rebar is in place.

Then it was on to the wall between the studio and the rest of the house.  This was a bit more difficult as there is a diagonal. The wood for the forms needed to be cut so that we'd have a nice, sharp edge where the diagonal meets the other two walls.

Here you can see the strings that have been laid out.  The wood is there so that I didn't trip over the strings.  It sort of helped <g>


Forms are done.

Our new fur-baby, Lucy, checks it out.

A detail showing the rebar.

Bird's eye view (and we've had birds in the house!)

Since our floors are going to be earthen, while digging the footings, we also have to trench for the propane and water.
Here you can see two PVC sleeves - one for the water and one for the propane.  We will have a sink in the studio with an on-demand hot water heater plus a small propane back-up heater in the office.

This is just to the right of the photo above.  This trench will follow the wall around the perimeter of the living room to the kitchen, bath and under the bedroom to the water pressure tank in the garage. Trenching will also have to be done for the black-water drain. All of the plumbing will have to be roughed in before the footings can be poured.

Next is on to staking the walls for the bedroom, bath and pantry. But first the space needed to be cleared out.
In order to get the level of the top of the footings the same height as the grade beam, Rick got to use his nifty laser level.

There have been many times over the last year and a half where we have marked out these walls - just to get a sense of what the spaces were going to "feel" like.  This time it's for real! We have done some futzing with the room sizes and wall locations and finally feel we have them the way we want them. (If you click on the picture you will get a bigger version of it that will allow you to see the words marking the rooms.) The wall between the bedroom and the sunspace on the right (where Rick is walking) will only be a 3 foot high adobe wall so the bedroom will be open to the sunspace.  It will be nice!

Good progress is being made and if we can get the plumbing in and inspected soon, we will be right on course to pour the concrete footings as soon as the nights warm up.