Tuesday, October 23, 2012

Roof - DONE!!!!!

On June 9, 2012 we started putting up the trusses for our roof.  On October 22, 2012 we finished the roof!!!!!  What a project.

But let me get you caught up:  When I last wrote we had just finished the covering on the hip end of the house.  The next thing to do was install the valley flashing then finish the roofing in the valley.


Then it was time for the fun part - installing the ridge caps. Every step of the roofing phase has kept me up nights.  Having never installed a roof and certainly not one with the pitch this roof has, I had no idea what to expect or how the process was going to go. Pretty early on I figured out that I had no trouble working on the top of the roof. Thankfully I'm not afraid of heights! With a little thought and discussion (sometimes a lot of discussion!) at each step we figured out what had to be done and how to do it. But the ridge cap had me mystified. Were we going to be able to reach each screw location from the ladders? How were we going to get the roof vent material up? Would we be able to use the ladder hooks over the ridge cap as we installed it? How easy was it going to be to move the ladders along as the ridge cap got installed?

Anyone who has had to follow a complex pattern (such as how to turn a heel on a hand knitted sock) knows that sometimes just doing something is the only way to figure out how to do it .....  so we just started.

We first did the ridge on the NE corner.  That went pretty smoothly.

Then we did the hip end of the roof - piece of cake.

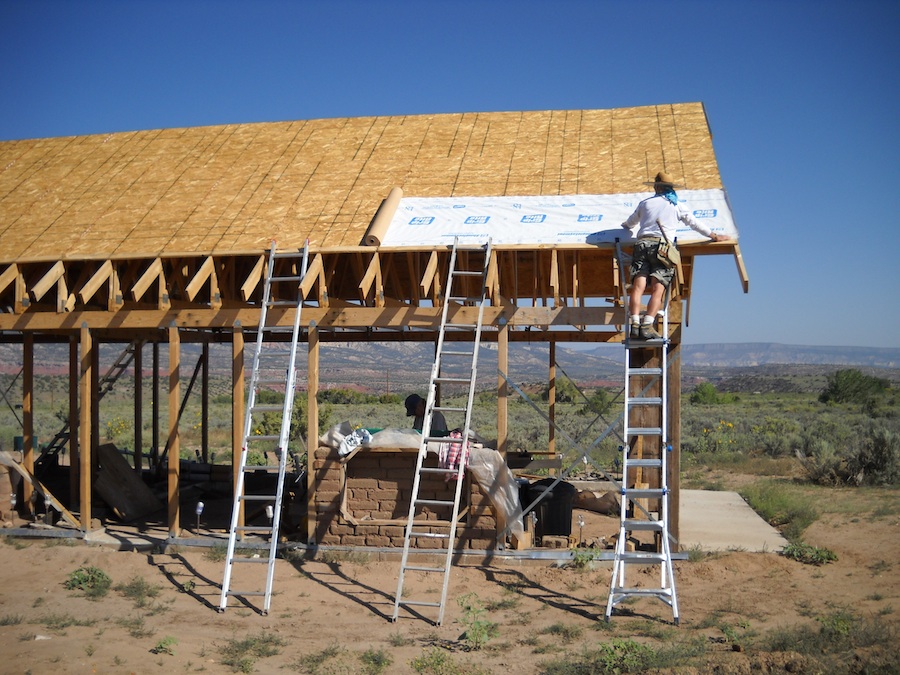
Then we got to the tough part.  Before the ridge cap could go on, the ridge vent material had to be installed.  This is porous material that allows for circulation through the roof but keeps out critters.  It comes in a roll and has sticky stuff that is supposed to help the material adhere to the roof before putting on the ridge cap.  I guess in a perfect world that would work but it didn't here PLUS it was windy!!!! So I had to use duct tape to keep it in place until we could get the ridge cap up there.

I worked out a system where I had a roll on each side of the peak tied on with rope.  I could let out just enough at one time to allow me to tape it down before moving on. While it was time consuming and tedious, it worked.

But the question still remained - how were we going to get the cap up there, hold it in place, screw it down and then move on to the next one?  This was a question that haunted my sleep - or non-sleep.  Suffice it to say that it kept me awake nights.

We discussed many, many ways of doing it, finally decided on one that we thought might work and went for it.  And it DID work!  And we were able to use the ladder hooks over the installed ridge cap without denting it.  Piece of cake!  Even though it was windy - again.  (It felt like the wind would just wait for us to get out there to start work and then it would start to blow!)  Once we got started it went very smoothly.

First section of ridge cap done!  Only one left to do. I finally felt like I could see the light at the end of the tunnel!!!!!

Here's Rick doing the last little bit.

Ta da!!!!!!  DONE!!!

Our beautiful roof looking SE

and looking NW

I'm still having trouble believing that I really don't have to get up on that roof again! My arms, shoulders and legs are stiff and tired and we both have bruises in strange places but my heart is light. We did it! It is a wonderful feeling! This time last year we hadn't even poured the foundation grade beam yet! And now look at our house!!!

I am now looking forward to working on the ground and starting to stack the straw bales for our walls. How far we get with this phase of the project before winter sets in is going to depend on the weather but we'll keep on keeping on.

Until next time . . . we're on to the next skill set.


Saturday, October 13, 2012

Update

Shortly after my last blog post, Rick had to go to California for family and work.  He was gone a week and returned to multiple work deadlines which curtailed our house building adventures for a bit.

But - there were things that I could do.

The first thing I did (after cleaning up the house site) was to do some plastering tests. Our current thinking is that the outside walls will first get a coat of earthen plaster about 1" thick, then a coat of earth/lime plaster with a final coat of lime/sand plaster. Since one of our main objectives is to use as much local ingredients as possible, my hope was that the dirt on our property would work for our plaster. To have something to compare it to, I also wanted to do a test using the same dirt we used for the mortar on the adobe walls. I know we don't have a great deal of clay in our soil so to make the plaster sticker, I added horse manure, sand and chopped straw. The only difference between the mix of our dirt (with less clay) and our friend's dirt (more clay) was that I used more manure in our dirt.

Here are the two tests - our dirt on the left and our friend's dirt on the right.

Here's our dirt plaster today after three weeks. The bale is sitting just about where the wall will be. We got 3/10" of rain yesterday and there's very little degradation that I can see.

If we decide to bite the bullet and put the walls up before hard winter weather sets in we will have to get one good coat of plaster on the outside to protect them. We have 2 foot overhangs, which will also help protect the walls.


The other task that needs doing is instillation of the soffit vents. This entails cutting 22" pieces of 2x6, attaching screen and then installing in the space between the trusses at the roof line. These vents will allow cooler air to circulate through the roof helping to minimize moisture buildup under the roof.
This is a picture of a 2x6 cut to the correct width (many of these were spacers we used when installing the trusses - just recycled) with the screen stapled to it, ready for instillation.

Here they are installed.

I had originally wanted to drill 3-2" holes in the wood to be covered by the screen but we just didn't have a drill powerful enough to do that and I couldn't justify spending the money on one just for this.

This task quickly become one of my most least favorite task so far!  For every soffit vent I had to climb up and down the ladder at least twice - if I was lucky!  I have managed to get close to half of them done so far.  Luckily they are not critical at this point so I can take my time.


The next BIG thing is the straw bales!  If we didn't get them this year, it might be this time next year before we could get them so we decided to order them and store them under the roof in the house.  If we decide we have time to get the walls up, they are ready.  If we decide we need to wait until spring, they are protected under the roof and will be there when the weather warms up.

So we called a local guy we know who has gotten us building-grade bales before and placed an order for 700 and set a date for delivery. We also lined up 2 or 3 guys to help us.

The day we were supposed to take delivery we got a call saying the truck had run over something on the highway, blew two tires and cut an air line! The delivery guy promised to get them to us in a day or two. The day or two turned into 8 days!  The folks we had lined up were no longer available so it was up to me and Rick to move them.

The idea was to back the truck next to the house and off-load directly into the house. The trailer was too top heavy and the land by the house too uneven for that to happen so the trailer had to be parked in our driveway.  This meant the bales had to come off the trailer onto our truck which we then drove to the house and unloaded!  Thankfully the trucker was able to leave the full trailer with us so we had some time to unload!
We collected all the wooden pallets we could find and set them up in the house for something on which to rest the bales.


The bales finally arrive!

Here's a view from the top of the bales looking at the house.  This was a VERY big pile of bales!!!

Ready for work.

We found the chutes & ladders approach to work the best.  I'd climb up the ladder and move the bales onto the chute where they'd slide down to Rick who would pile them on the truck. Rick found that as he went and got better at stacking the bales on the truck, he got to where he could get about 40 bales in one load.

The first load in the house.

Our straw dog.  Tex really loved climbing on the bales.  The challenge was keeping him from peeing on them!

Rick and I spent two days moving bales. We did about 5 loads a day and managed to move about 200 bales. On the third day, we did two loads then our friend Steve showed up to help.  We did a couple more loads and then our friend Ramey (of truss angel fame) showed up and helped us get the last 4 loads (two in our truck and two in his truck) done! It felt like a miracle to have our friends help! I really didn't think we'd be able to finish on the third day - and wouldn't have without them!!!

The LAST bale!

A well deserve break!

Here's what a full load looked like on our truck.

Just in case.

After three days of moving 700 bales there was straw EVERYWHERE!!!  The truck is still full of it!

My hands really took a beating and I was wearing gloves!  I could hardly bend my fingers in the morning after moving bales the day before.  Sure was glad to see that last bale get unloaded!


Now it's back to the roof. In the last two days we've managed to finish the roofing on the south hip. We have the valley and the hip on the NW corner and the ridge cap left to do. Today was windy and cold but tomorrow looks to be sunny and warmer with little or no wind.  Let the fun continue!


Tuesday, September 11, 2012

Roofing Saga Continues

One thing I am learning in this house-building adventure is not to estimate the time it will take us to do any given job - especially when it's a job we've never done!  I was really hoping that we could get the roof finished while our friend was here but it's a much bigger project than I imagined!  We have managed to get about 75% of it done, though, and for that I'm grateful!

Once we got the underlayment done it was on to the metal roofing.  Rick constructed a giant triangle out of 1 x 4s to help us get the first piece on square.

Here's Rick and Dennis marking for the first piece of metal roofing.

We decided to pre-drill to make attachment easier, and it sure did!

A couple of things we learned:  Use the best drill bits you can find.  We went through many before we learned this!  Second:  Only pre-drill 4 or 5 sheets at a time.  This not only makes the drilling process easier, thus saving the bits but we realized that we had to reverse where the holes went when we moved to the east and south sides of the roof due to the way the panels have to overlap.  If we'd drilled all of the panels first we would have been in trouble!

First panel going up!

Dennis, the Roof Angel.

End of the first day of metal roofing instillation.

Rick and Dennis making a template to use when cutting the panels for the hip and valley sections.

We decided, however, to continue installing full sheets to take full advantage of Dennis' help to get as much done as possible before he had to leave.  Cutting and installing the panels on the hips and valley will be a much more time consuming process.

While Dennis was here we finished the west roof and started on the south roof.

Rick and I finished the south roof.

And the east roof by ourselves.

Now the adobe walls have protection!  This is looking out the front door.

This picture was taken on August 29 before we started the underlayment.

Twelve days later we almost have a roof!

Rick has to go to California this week so we will not be able to work until he gets back. We still have the hips and valley to do plus the ridge cap but hopefully that will only take us a few days - once we get a system figured out.

We have talked to our straw bale supplier and hope to have our bales delivered soon then it will be on to the next step.  Hopefully we can get the walls up and protected before the first snows!

NOTE:  A year ago when we started on the foundation I spent many sleepless nights worrying about getting the house square.  One reads so much about how being off just a little bit at the beginning gets magnified as the process progresses.  What would we find when we got to the truss instillation?  Would the roof panels fit squarely?  I am happy - and relieved - to say that our house seems to be good and square!!!  Whew!

Sunday, September 2, 2012

Button 'er up!

On August 28 we had - and PASSED - our framing inspection!  There were so many things I was worried about and the inspector didn't say anything about any of them.  He looked everything over, told Rick it looked good and to go ahead and "button her up".  So that's what we're doing now.

Our friend Dennis of "roof truss angel" fame returned to help us with this next phase - which is to get the underlayment up, flashing in place and metal roofing installed.  Our friend Steve came back to help as well.  We've spent the last four days doing the underlayment.
Dennis is a California guy <g>

First course of underlayment going on.

Steve and Dennis hard at work.

Dennis and Steve taking a well deserved break.
This is the garage area.  Behind Dennis is the start of the house proper.  He is standing in the doorway which will open into our sunspace.  The bedroom will be to the right.  There's a real sense of volume now.

We got the first three courses of underlayment up without too much difficulty but how to reach and tack down that last course - that was the question and I ended up thinking about it at 4 AM.  Here's what I came up with.

We found some really cool ladder hooks on line that attach to the top of the ladder and allows the ladder to hook over the peak of the roof thus giving a stable structure from which to work.
I decided I needed a "hands free" method of unrolling the underlayment so I threaded a couple of lengths of bailing twine through the tube.  Tied the tube to the ladder at the correct height . . .

which then allowed me to move the ladder and unroll the paper at the same time.  I was able to reach about 3 feet and climbing up and down the ladder allowed me to get to all the tacking marks.

Here I am snugging the paper in place.  This method worked like a charm.  I was able to do one section - by myself - in a little over an hour.  Hard work though.

Dennis finishing up the last few feet of underlayment.

Steve and Rick installing the purlins at the eaves of the house.

Dennis and Rick starting the instillation of the drip flashing.  We're finally on to the metal bits and hope to start the final roofing material tomorrow.

This has been really hard work but we've accomplished a lot in a few days and hope to get a good start on the metal roof before Dennis leaves.

This has been a huge job!  One that certainly would have taken a whole lot longer without the help of friends!  I will be SOOOOO glad when the roof is done and I don't have to climb up there any more!