Friday, June 7, 2013

More Framing

Phase III

With the inside walls framed it was time to raise the vigas into place and build the decking over the studio and bath and bedroom. But first, Rick wanted to put up his "painting wall"

That done it was on to the vigas. Even though these vigas are very old they are still VERY heavy.  It took our friend Sam and Rick a little time to figure out the best way to get them up.

 Once they figured it out, it went pretty smoothly.
.
This is how we attached the vegas to the bond beam. There will be a 6" bolt screwed in from the other side


Rick and Sam got up two vigas and Rick and I got up the last two with the help of a heavy duty car jack.

Then the deck went on.

Deck on - storage space galore!

The next task was to get all of the vegas up over the bedroom/bath area. This was more of a challenge because 1) the vigas in general were bigger and 2) we were not going to have the same maneuvering space we had for the studio.  We ended up bring them in through the windows in the sunspace. This was a big job and it took four of us!

Taking a break. I wanted to get a picture of the process happening but I was outside holding one end up while the guys worked on getting the viga up and over the top plate. My hands were occupied!

Done!

This is what the vigas look like from the living room.

Sleeping loft! There will be a short wall/railing all around.

Battery Shed

Before we can start plastering the outside (which we hope to get done before the summer rains start - that is assuming [and hoping] we HAVE summer rains) we have to build the battery shed. This is where the solar batteries will be stored and it's on the north side of the house.
It will have straw bale walls but they won't go up until after the roof is on.

In the process of putting up the rafters I realized that it was going to be VERY difficult to get in there to plaster between the bond beam and soffits if I waited until AFTER the roof went up so I quickly mixed up a batch of mud plaster. Luckily I had done some tests and had a "recipe" all ready to make. This is the first plaster on the house!

As I'm mixing up the dirt, sand, straw and horse manure I suddenly feel this connection to all the Pueblo and Hispanic women who have done this very same thing over the generations. Traditionally mud plastering in our neck of the woods was always the job of the women of the pueblos and villages. It's an honor and joy to be a part of that tradition!


Thursday, May 23, 2013

Framing!

It's been three weeks since I last posted and as I was going through all the photos, getting them ready to write the blog I realized just how much we've gotten done! This has been a very exciting phase as all of a sudden (well maybe not so sudden) we have ROOMS.  I really expected the house to start feeling smaller but the opposite seems to have happened.  It feels very roomy and open - still!

Neither Rick or I had really ever done any framing so we spent a lot of time reading books and looking up You Tube videos online. (I'm not sure how we would have gotten as far as we have without You Tube and the internet!) But at some point we had to start.

But first I had to finish the adobe wall between the bedroom and sunspace.

That done, it was on to the framing.

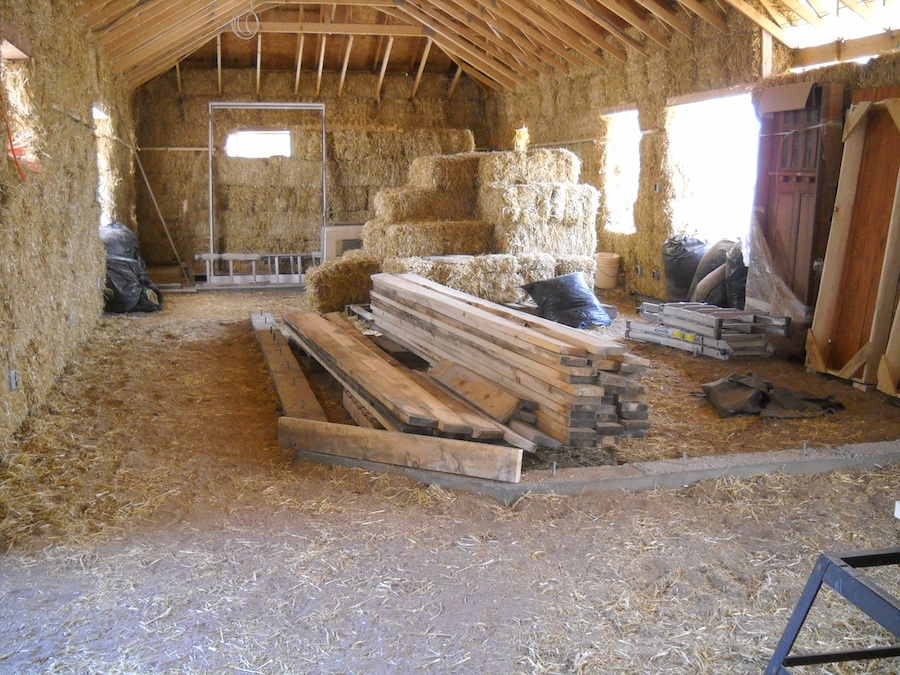
First thing was to haul the wood inside.

Then we had to install the sill plates on all the footings.  
Here you see the sill plates going in on the studio wall.

Office wall

Pantry, bath and bedroom

First stud installed (by a stud <G>)  The 2 x 6s that we're using are 14 feet long.  This was not quite long enough and we had to attach another piece so it would reach all the way!
First section done.

Framing in the door.

Office wall done.  There will be a lovely French door installed here.
First studs up for the wall between the studio and living room.

Corner turned.

This is the wall separating the studio from the hallway.  Rick had work work he had to do so I framed this wall all by myself!  Fun!!

As you can see, the ceiling will be very high!  (It will eventually be covered with aspen T&G.) The wall between the hall and studio will go all the way up, too, but first we need to install the floor to the storage space. There will be vigas that will span from the bond beam to the short wall and will stick out about 18".  Should look really nice!

A glass artist friend of ours in San Diego gave us this window that she made.  There's a pane missing (which she is in the process of replacing) but we think it will look really lovely.  This will let more light into the hall. We have been carrying this window around with us for almost 13 years!  It's nice to finally have a home for it.

Ready for phase II

When we first moved to Youngsville almost 9 years ago one of our neighbors gave us a bunch of vigas that came out of a log cabin he had disassembled in the village.  We are using them to construct the ceilings here and in the studio but decided we also wanted one at the corner of the kitchen.

Another salvaged piece of wood that we've had hanging around for a number of years was this 6x6. It makes for a perfect beam over the adobe wall in the bedroom.


Phase II


Sunspace wall framed.

Kitchen wall framed.  That piece of viga hanging out in mid air on top of the wall is there so we can see what it will look like once all the vigas are up. The ceiling will go on top of the vigas.

We needed a way to attach the framed walls to the straw bale walls.  This is what we came up with: 2x2s  pounded into the straw to which the stud is then attached.

Walls are framed and the final top plate is going up.

Looking toward the living space from the door to the garage.

So here you have it -
Office

Studio

Pantry! (Can't wait!!)

Bath - this is an L shaped room. I'm standing in the hall looking toward where the shower will be.

Bedroom

This will be our view from the bed.

Bird's eye view from the dinning room looking first east (on the left) and then south toward the studio.

Speaking of birds. We have had a number of birds join us in the house.  One morning I got there and two morning doves flew out! We also had a humming bird visit. But the most fun has been a pair of swallows. They have been hanging out and singing to me almost daily. 

Vigas

Phase III will be the instillation of the vigas over the studio and bath/bedroom area onto which the floor will be built. These vigas are big and heavy! So we've started moving them from where we've had them stored for almost 9 years to the house - a couple at a time. Getting them up will be a challenge but we think we've figured out how to do it.

Starting to off load the first two vigas.

No telling how old this wood is but you can be sure it came from close by. The growth rings are VERY narrow and close together signifying that this tree grew in an area where there is not much rain and slow growth.  
Even after many years, this wood is still very solid!

Stay tuned!


Wednesday, May 1, 2013

A Lot of This and That

While we waited for warmer weather so we could pour cement, we've been doing a lot of this and that.

Garage

The first thing we did was get a lot done on the garage. Openings for windows and door had to be cut.

Then the OSB had to be covered.

Rick had to build windows.  Windows had to then be installed

Rick's beautiful door.   Door installed.

Straw bales installed.


Power Shed

There will be a shed attached to the north side of the house which will hold all the batteries for our solar system. It was now time to dig that footing and get it ready for cement.


Plumbing

With the weather warming up and footings all dug and in place it was time to get the plumbing roughed in.


Cement

Plumbing rough done and inspected.  Weather warming up. Time to pour footings! Our electrician borrowed a gas powered cement mixture and he and a friend came and helped us. I felt we could get it all done in a day but, with Samuel and Antonio's help, we got it done in a morning!
Samuel and Antonio preparing the first batch of cement.

First footing done!

My job was to screed the cement smooth.

Footings poured!

Forms removed!

First wall!

With the footings poured and dry, it was time - finally - to start putting up the inside walls. We started with the wall that separates the bedroom from the sun space. It will be a 36" adobe wall so that the bedroom will be open to the sunspace. Once again we're using another piece of the old highway bridge to frame the doorway.
Lucy's helping us get ready to put up the big post.

Post up!

First adobes ready for instillation.  It's been over a year since I did the trombe walls and it took me a little time to remember how to mix the mud.

After the first's days work.

Four courses done!  Half way there.

Next

Our next big project is to finish framing all the inside wall so that the electrician and plumber can finish the rough-ins. I've never done framing so this will be another learning experience. We hope to get started on the first wall in the next few days.  Until then, I will continue laying adobes.